
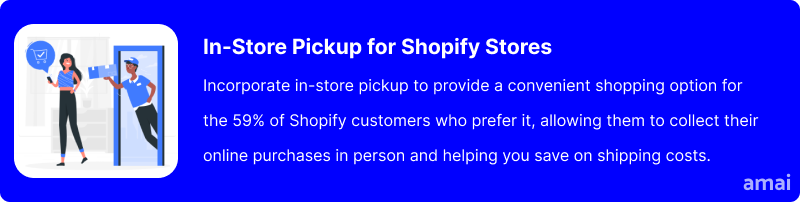
In-store pickup is a great way to offer customers the convenience of shopping online while still being able to pick up their purchases in person. It can also help you save on shipping costs. Shopify statistics show at least 59% of customers are interested in the in-store pickup option.
For clarity, in-store pickup is sometimes referred to as click and collect, curbside pickup, and local pickup. If you want to give your customers the option to pick up their orders from your shop instead of having them delivered, you can do so by adding in-store pickup to your Shopify checkout.
Benefits of Adding In-store Pickup for Shopify
Increased Foot Traffic
By default, adding in-store pickups for your Shopify business will lead to an uptick in foot traffic at your store. This increased foot traffic has its unique benefits as it is a way for you to connect with your customers on a more personal level. The better this connection, the more rapport you get to build with them to ultimately earn their loyalty.
Upselling and Cross-selling Opportunities
When customers physically visit your store for their pickups, it offers a chance for you to get more sales through upselling and cross-selling. This interaction allows you to showcase additional products that complement their purchase and encourages impulse buys. Impulse buys make up between 40% and 80% of sales. For instance, if a customer comes in to pick up a laptop they ordered online, this could be an ideal time to upsell a laptop case or an extended warranty or cross-sell peripherals like a mouse or a keyboard. They could also find other laptop accessories desirable and buy on the spot.
Savings on Shipping Costs
In some instances, it is way cheaper for customers to pick up their goods than get them shipped to them. Thus, offering in-store pickup for your Shopify store can help save on shipping costs – a win-win for the seller and buyer. This is particularly beneficial for small businesses that may not have the volume to negotiate lower shipping rates.
Reduced Returns and Exchanges
Returns and exchanges are quite common in retail. However, customers who pick up their items in-store are less likely to return or exchange products since they have the chance to inspect their purchases immediately. Additionally, staff can assist with any immediate concerns or questions, further reducing the likelihood of returns.

Before You Start
There are a couple of things you need to have in place before you add in-store pickup to your Shopify store.
Check Your Eligibility
For stores with multiple locations, activating multi-origin shipping is a prerequisite for utilizing the pickup option.
Activate Multi-Origin Shipping
Multi-Origin Shipping is enabled by default if you have two or more stores. But if you have one store or don’t have a Shipping Profile, you are most likely using Single-Origin Shipping.
To switch to Multi-Origin Shipping, go to your Shopify admin dashboard and navigate to “Settings” on the bottom left of the menu. From there, click “Shipping and Delivery” to open up a new menu.
Under the “Shipping” section, click the “Manage” button, and you’ll see a “Shipping from” section. This is where you’ll find the “Activate multi-origin shipping” option. Click this and then tap “Save” to confirm your switch. Take note that you cannot switch back to Single-Origin Shipping after this.
Review Your Locations
To properly set up the in-store pickup option, ensure each location’s information is up to date.
Review the following details:
- Check Names and Addresses: Ensure each location has the correct name and address because they will be displayed to customers during checkout.
- Fulfil Online Orders: To include a location in the pickup option, tick the box “Fulfil online orders from this location”.
- Update Fulfillment Priority: In the “Locations” tab, go to the “Location Priority” section and check whether you need to rearrange your stores according to priority fulfillment. For example, the store with the lowest stock levels should be at the bottom tier.
- Check Stock Inventory: Look at your stock levels and update your inventory at each location. If a certain item is out of stock in a particular store, the pickup option for that product will not appear.

Adding In-store Pickup for Shopify: What are the Options?
There are two routes to add in-store pickup for a Shopify store: use your Shopify settings or use a third-party app. The former option is pretty basic and doesn’t offer you a wider range of features and capabilities like the latter one.
Using Shopify Settings
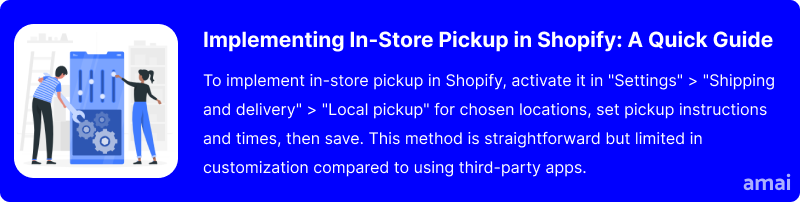
- Step 1: Enable Local Pickup
From your dashboard, head to the “Settings” menu and click “Shipping and delivery.” Scroll down until you see the “Local pickup” section. You’ll see your store locations listed here. Notice the “Doesn’t offer pickup” label on the right? You can change that by clicking directly on the location you want to enable. This will bring up a new menu, where you’ll find the check box “This location offers pickup.” Simply tick this box to enable in-store pickup at this location.
- Step 2: Confirm Information at Checkout
Once you have enabled local pickup, new sections will appear in the same window. You will see “Information at checkout” and “Order ready for pickup notification.”
For “Information at checkout,” you just need to confirm the expected pickup time. Choose your ideal option from the scroll menu. This section will also give you a preview of how your pickup location will appear to customers. If your location details are incorrect, you’ll need to go back to your location settings to update them.
For “Order ready for pickup notification,” simply input any instructions to the customer in the text box provided. You are allowed up to 255 characters.
- Step 3: Click “Save”
Once you’re done with all the above, make sure to click “Save” to confirm your pickup location. When you review your “Local pickup” section again, it will reflect the change.
Introducing Amai Local Pickup & Delivery
Amai Local Pickup & Delivery is a versatile tool for Shopify retailers. The app is designed to streamline the logistics of online order fulfillment. It distinguishes itself by offering robust features for both store pickup and local delivery options, enabling businesses to manage and customize multiple locations with ease. By focusing on operational efficiency and improving customer service, the app facilitates a more flexible shopping experience, catering to the evolving needs of both businesses and their customers.
How to Install Amai Local Pickup & Delivery
- Log in to your Shopify admin panel.
- Navigate to the Shopify App Store and search for “Amai Local Pickup & Delivery”.
- Click on the app listing from the search results.
- Press the “Add app” button to initiate the installation process.
- Follow the on-screen instructions to approve the app permissions.
How to Use Amai Local Pickup & Delivery to Configure In-store Pickup Only
You have the option to assign certain locations as in-store pickup only. This means that customers can only select local pickup for orders placed at those locations. This is another convenience you can offer, and it is a sales strategy that is gaining in popularity. A CNBC report noted that Walmart garnered an estimated $20.4 billion in sales for click-and-collect orders in 2021.
Configuring pickup-only locations is as simple as enabling in-store pickup for Shopify:
- Enable Online Orders:
- Go to “Settings” > “Locations”.
- Click on a location and check “Fulfill orders from this location”.
- Remove Rates:
- Navigate to “Settings” > “Shipping and delivery” > “Shipping” section.
- Click “Manage” next to your Shipping Profile.
- Scroll to “Shipping from,” click “Show details,” then select your location.
- Click “Manage” beside the location, choose “Remove rates,” and save changes.

Limitations of Shopify’s Native Settings and Competitors
While the process of adding in-store pickup for Shopify is simple, it does have limitations. For instance, you do not get full visibility on your pickup orders, and there are no detailed options like setting the minimum deposits for pickup.
Problems like scrambled delivery dates and incorrect addresses are commonplace with several other third-party apps. These issues can lead to customer dissatisfaction, which defeats the purpose of using an app in the first place. Also, some of these apps turn basic functionalities into a Herculean task that requires lengthy technical assistance. And the technical assistance offered by the support teams on some apps is nothing to write home about, leaving users frustrated and looking for alternatives.
Amai Local Pickup & Delivery distinguishes itself in the sea of Shopify in-store pickup apps for Shopify thanks to its excellent customer assistance, smooth integration into Shopify, and efficient handling of pickups and deliveries.

Features and Advantages of Amai Local Pickup & Delivery
- Customizable Order Fulfillment Options: The app allows you to integrate store pickup and local delivery into your Shopify checkout process. It offers the flexibility to set up various options tailored to your business needs, such as order deposits, collection times, order limits, delivery radius, and rates. This level of customization ensures that you can cater to your customers’ preferences, enhancing their shopping experience.
- Easy Management of Multiple Locations: Whether you operate a single store or multiple outlets, the app is designed to streamline the management of your locations. You can configure each store individually or make bulk changes, saving time and ensuring consistency across your business operations.
- Real-Time Stock Availability: Connect your Shopify locations with the app to display accurate, real-time stock availability per store or dealer. This ensures customers see what’s available and where, enhancing their shopping experience and your stock management.
- Optimized Operations: The app enables you to optimize your operations by setting daily order limits based on store capacity and customizing order rates based on weight and price. This level of detail in order settings allows for a tailored approach to handling orders, reducing the strain on your resources.
- 24/7 Live Chat Support and Developer Assistance: One of the standout advantages of this app is the round-the-clock live chat support and developer assistance available. Whether you encounter technical issues or need help optimizing the app for your store, you can rely on immediate support. This ensures that any potential disruptions to your service are quickly resolved, maintaining a seamless experience for both you and your customers.

Useful Tips
- Aim for same-day pickup, ideally within a few hours of the order. This creates a positive experience and encourages repeat business.
- Ensure your online inventory reflects real-time stock levels to avoid disappointing customers with out-of-stock pickups.
- Inform customers promptly when their order is ready for pickup. Consider email and SMS notifications.
- If you have multiple stores, allow customers to choose their preferred pickup location during checkout.
- Equip staff with the knowledge to handle pickup orders efficiently and provide excellent customer service.
- Advertise in-store pickup on your website and social media channels.

Summary and Advice
Offering in-store pickup enhances customer satisfaction by providing convenience and flexibility in order fulfillment, directly boosting sales through increased store visits. Utilizing Amai Local Pickup & Delivery for Shopify enhances the customer journey with efficient in-store pickup options, fostering stronger loyalty and increased chances for repeat purchases. It’s a tactical move aimed at refining operational workflows and capitalizing on your digital and physical storefronts’ capabilities.