
The cart abandonment rate in e-commerce is notably high, with 18% of carts being abandoned due to lengthy and complex checkout processes. Simplifying this process can significantly reduce cart abandonment rates and enhance customer satisfaction. Allowing customers to access discounts without manually entering a code can therefore be a masterstroke if you aim to entice customers with discounts while maintaining a seamless checkout flow.

Advantages of Offering Discounts Without Code on Shopify
Reduces Cart Abandonment
Discounts are generally used to reduce the rate of cart abandonment by incentivizing customers to complete their purchases. Automatic discounts take this a step further by eliminating friction at checkout. Customers don’t need to search for or enter a code, removing a hurdle that might cause them to abandon their cart altogether.
Generate More Sales
A Shopify discount without a code can help generate more sales, where a discount (either as a fixed value or percentage) is automatically applied at check-out. This is helpful for site-wide sales, especially on mobile devices, and can save some marketing efforts by removing the need to promote a specific code.
In fact, it has been found that an estimated 60% of consumers are likely to try a new product as a result of a discount, and a further 46% said they’d change their original purchase to benefit from a discount.
Improved User Experience
Chuck Mazzone, Digital Marketing Director of Out-of-Print, says that “offering automatic discounts is much more seamless than sending customers discount codes they have to enter manually”. He added, that as purchases made on mobile devices increase, the usability of manually entering a discount code becomes more difficult. Mazzone added, “The real benefit with automatic discounts is that it does the work for the customer and means they have one less thing to worry about”.

How to Activate Discounts Without a Code on Shopify
To activate discounts that require no code on Shopify, you can either use the native setting or a third-party app specifically designed for this purpose and more. The former offers only basic functionality, while the latter option typically gives users more than basic discount functionalities. This is why most Shopify merchants opt for third-party apps for their discount activation and management.
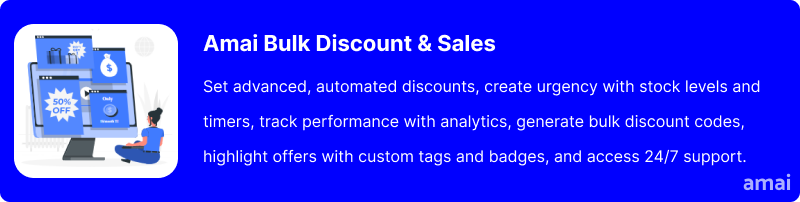
Introducing Amai Bulk Discounts & Sales Manager
Amai Bulk Discounts & Sales Manager is your go-to tool for anything related to discount activation and management on Shopify, including no-code discounts. This Shopify app streamlines discount creation and management. Schedule automatic discounts for hundreds of products at once, set up flash sales with countdown timers, and leverage features like custom badges and quantity displays.
How to Install and Use the App
- Log in to your Shopify admin panel and navigate to the Shopify App Store.
- Search for “Amai Bulk Discounts & Sales Manager“.
- Click “Add app”.
- Follow the instructions to grant the app the necessary permissions and complete the installation.
To create automatic discounts, follow these steps:
- Go to your admin section.
- Click on Bulk Discount & Sales Manager to access the dashboard.
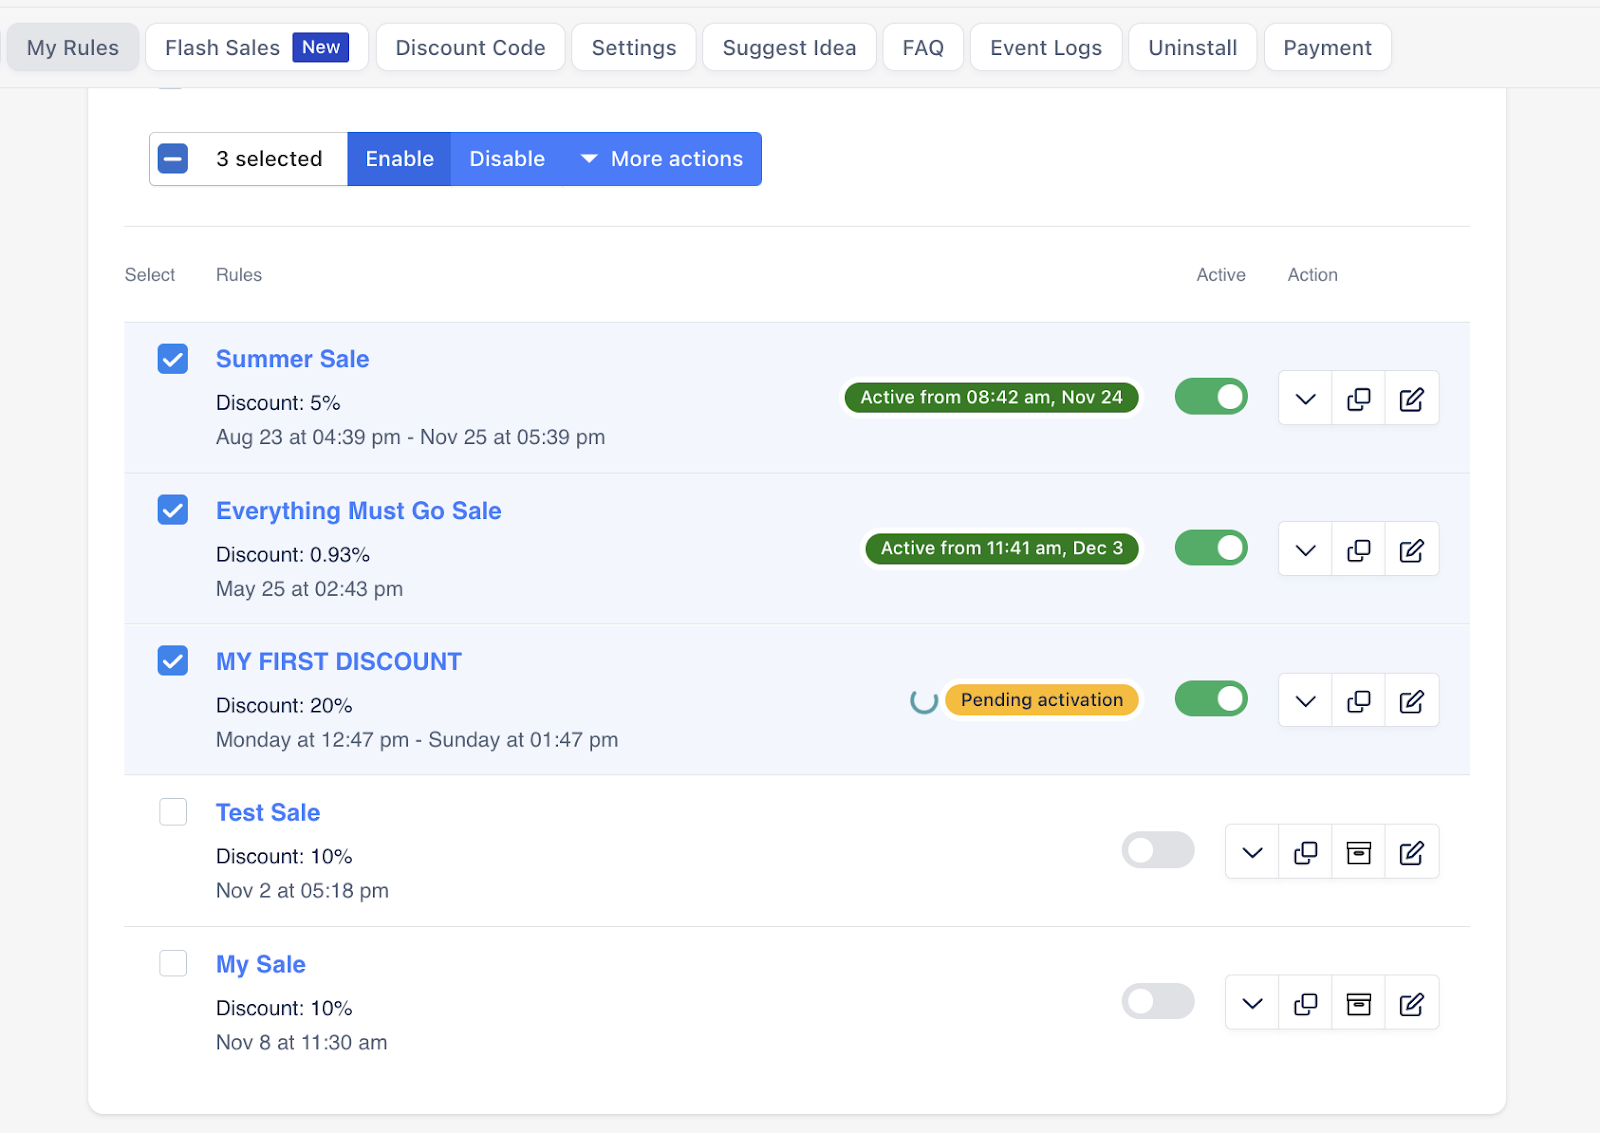
- In the dashboard, go to ‘My Rules’ in the top menu.
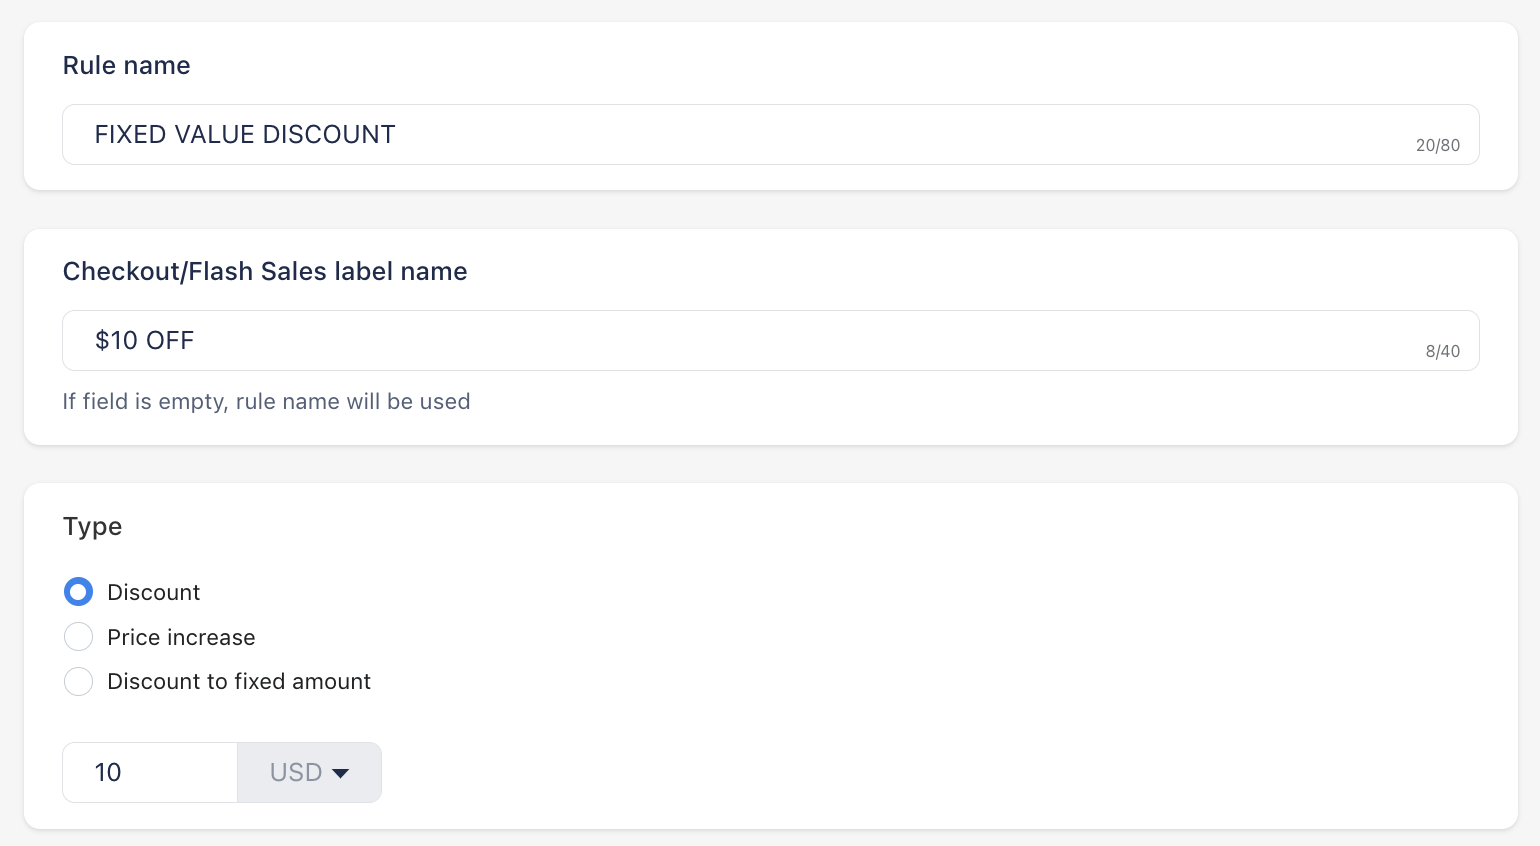
- Click on ‘create rule’ to access ‘discount rule settings’.
- Choose between a fixed value or a percentage discount:
- Fixed Value Discount: Select ‘discount,’ input the value, and set the currency to USD.
- Percentage Discount: Select ‘discount,’ input the percentage, and set the unit to %.
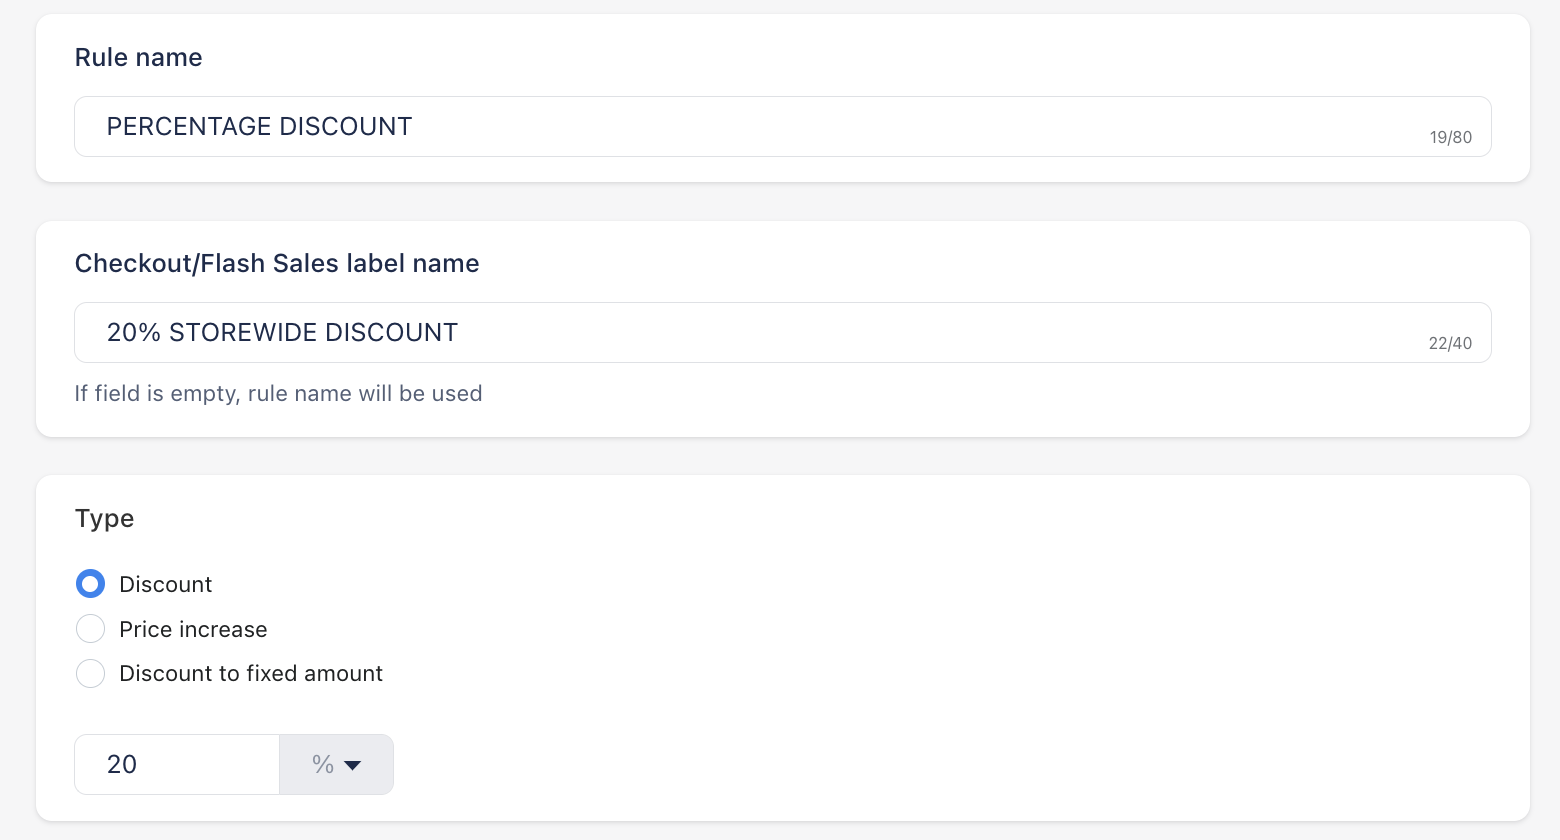
- Set your discount based on “current price” or “compare at price.” (You can refer to this article on how discounts are calculated).
- Apply discounts to individual products, variants, collections, tags, vendors, and the whole store, or use advanced filters.
- Optionally, add a discount period (start/end dates, recurrence), a countdown timer for urgency, discount price rounding, and product tags to display sales badges.
- Review all settings in the summary card and click ‘save’ to finalize the discount.
How to Create Multiple Automatic Discounts with the App
- Create another discount rule by choosing the type of discount that you want to create, such as automatic discount, buy X get Y discount, free gift, discount code, or free shipping.
- In the left-hand menu of your Shopify admin section, select Amai Bulk Discount & Sales under Apps.
- Navigate to ‘My Rules’ in the main menu.
- In ‘My Rules,’ view the list of all created discounts, select each discount you want to run, and click ‘enable’ in the menu bar.
- Your selected discounts will now run simultaneously throughout your online store.

Features and Advantages of Amai Bulk Discount & Sales
- Advanced Discount Options: With the app, you can set discounts to specific prices, percentages, or dollar values. Apply discounts based on tax rates, vendors, or price ranges for highly targeted promotions.
- Automated Sequential Discounts: Discounts can be set to renew automatically on a weekly, monthly, or yearly basis, ensuring that promotions continue without manual intervention. This feature prevents sales from slowing down due to expired discounts, maintaining a steady flow of promotions that keep customers engaged and returning to the store.
- Quantity Remaining and Countdown Timer: Create urgency and display how much stock is remaining for any of your products. The app also allows you to set up a timer to let users know how soon your sales might end.
- Sales Reports & Analytics Dashboard: A comprehensive analytics dashboard tracks sales and conversions from your discount rules in one place. This feature provides clear insights into the effectiveness of your discount strategies, helping you to optimize future promotions.
- Bulk Discount Code Generation: Generate hundreds of unique discount codes instantly for voucher campaigns. You also save time on discount activation with a user-friendly dashboard to create, schedule, pause, or duplicate discount rules in just a few clicks.
- Custom Tags and Sales Badges: Highlight special offers with custom tags and sales badges, attracting customer attention and boosting sales of promoted items. This feature enhances the visibility of discounts, making it easier for customers to identify and take advantage of deals. Custom tags and badges can be designed to fit the store’s branding, making promotions more appealing and professional-looking.
- 24/7 Live Chat Support: You’re never alone when you choose this app. Access to 24/7 live chat support means store owners can get assistance with installation and configuration issues whenever needed.
Useful Tips
- Clearly display discount amounts on product pages and during checkout to emphasize the deal.
- Plan and schedule discounts in advance to align with marketing campaigns and seasonal promotions.
- Test different discount strategies to see which ones drive the most conversions.
- Encourage higher spending by setting minimum purchase amounts for discounts to apply.
- Limited-time offers or countdown timers can create a sense of urgency and encourage purchases.

Summary and Advice
No-code discounts can significantly enhance the overall customer experience, particularly at checkouts. Streamlining the process and removing the need for manual code entry allows customers to enjoy a seamless and efficient shopping journey. Amai Bulk Discounts & Sales stands out as a game changer, offering advanced features and automation to help you manage discounts effortlessly. Leveraging this powerful tool optimizes your discount strategies, boosts sales, and provides a superior shopping experience for your customers. Don’t miss out on the opportunity to transform your store’s discount management—try Amai Bulk Discounts & Sales Manager today. Your free trial awaits!